Important: This article refers to the Styku S100 model scanner. To determine which model scanner you own please view the following article: https://www.styku.com/help/search/which-styku-scanner-do-i-have
Step 1 : Make sure the Kinect Sensor cable (black cable) is not plugged into any USB port on the computer.
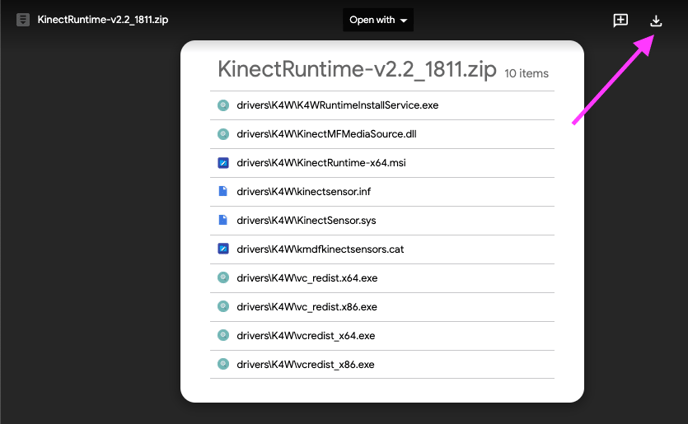
Step 2 : Download the contents of KinectRuntime-v2.2_1811.zip to a location on your PC. You can use this link to download the file.
After downloading, press the Download button in the upper right hand corner to download the zip file.
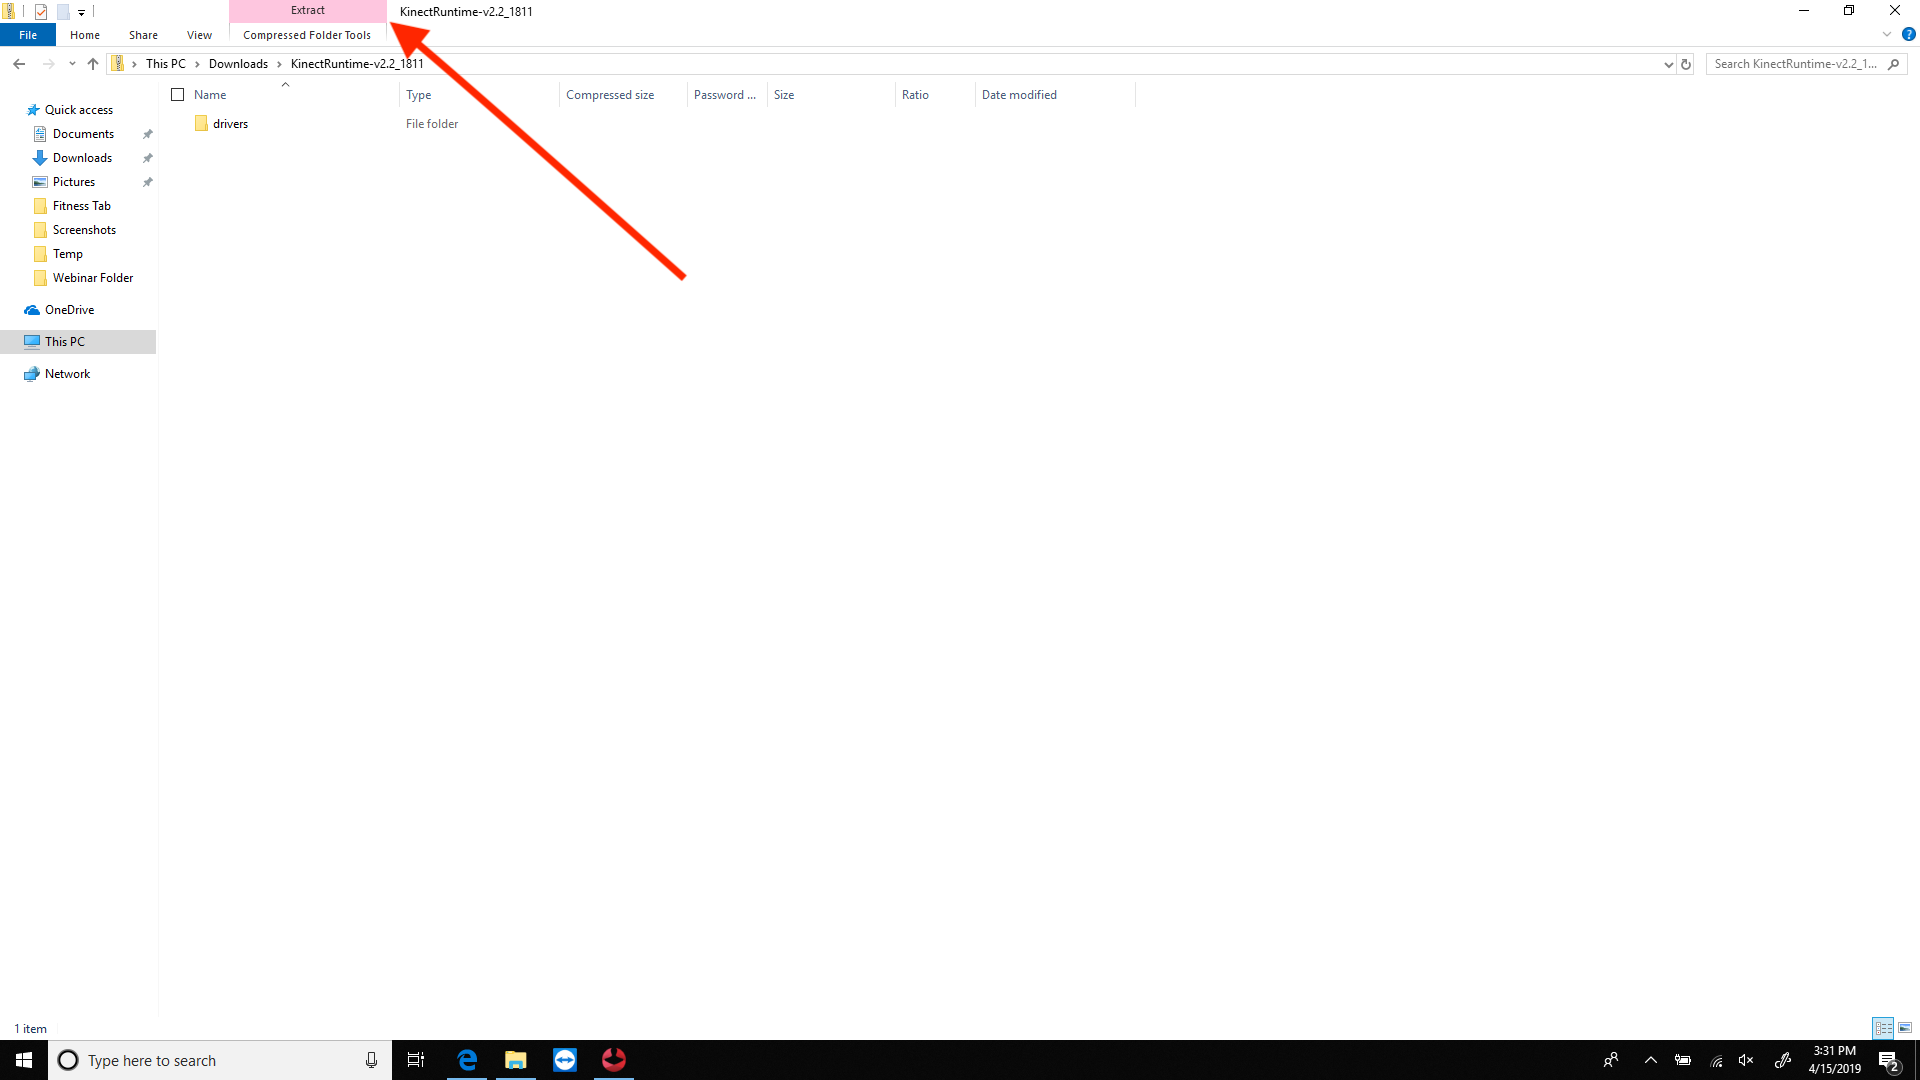
Step 3: Open the folder where you saved the file you downloaded.
Step 4 : Click on Extract in the window to open the Extract tools.
Step 5 : Click on Extract All. The file will extract into a folder. Open that folder.

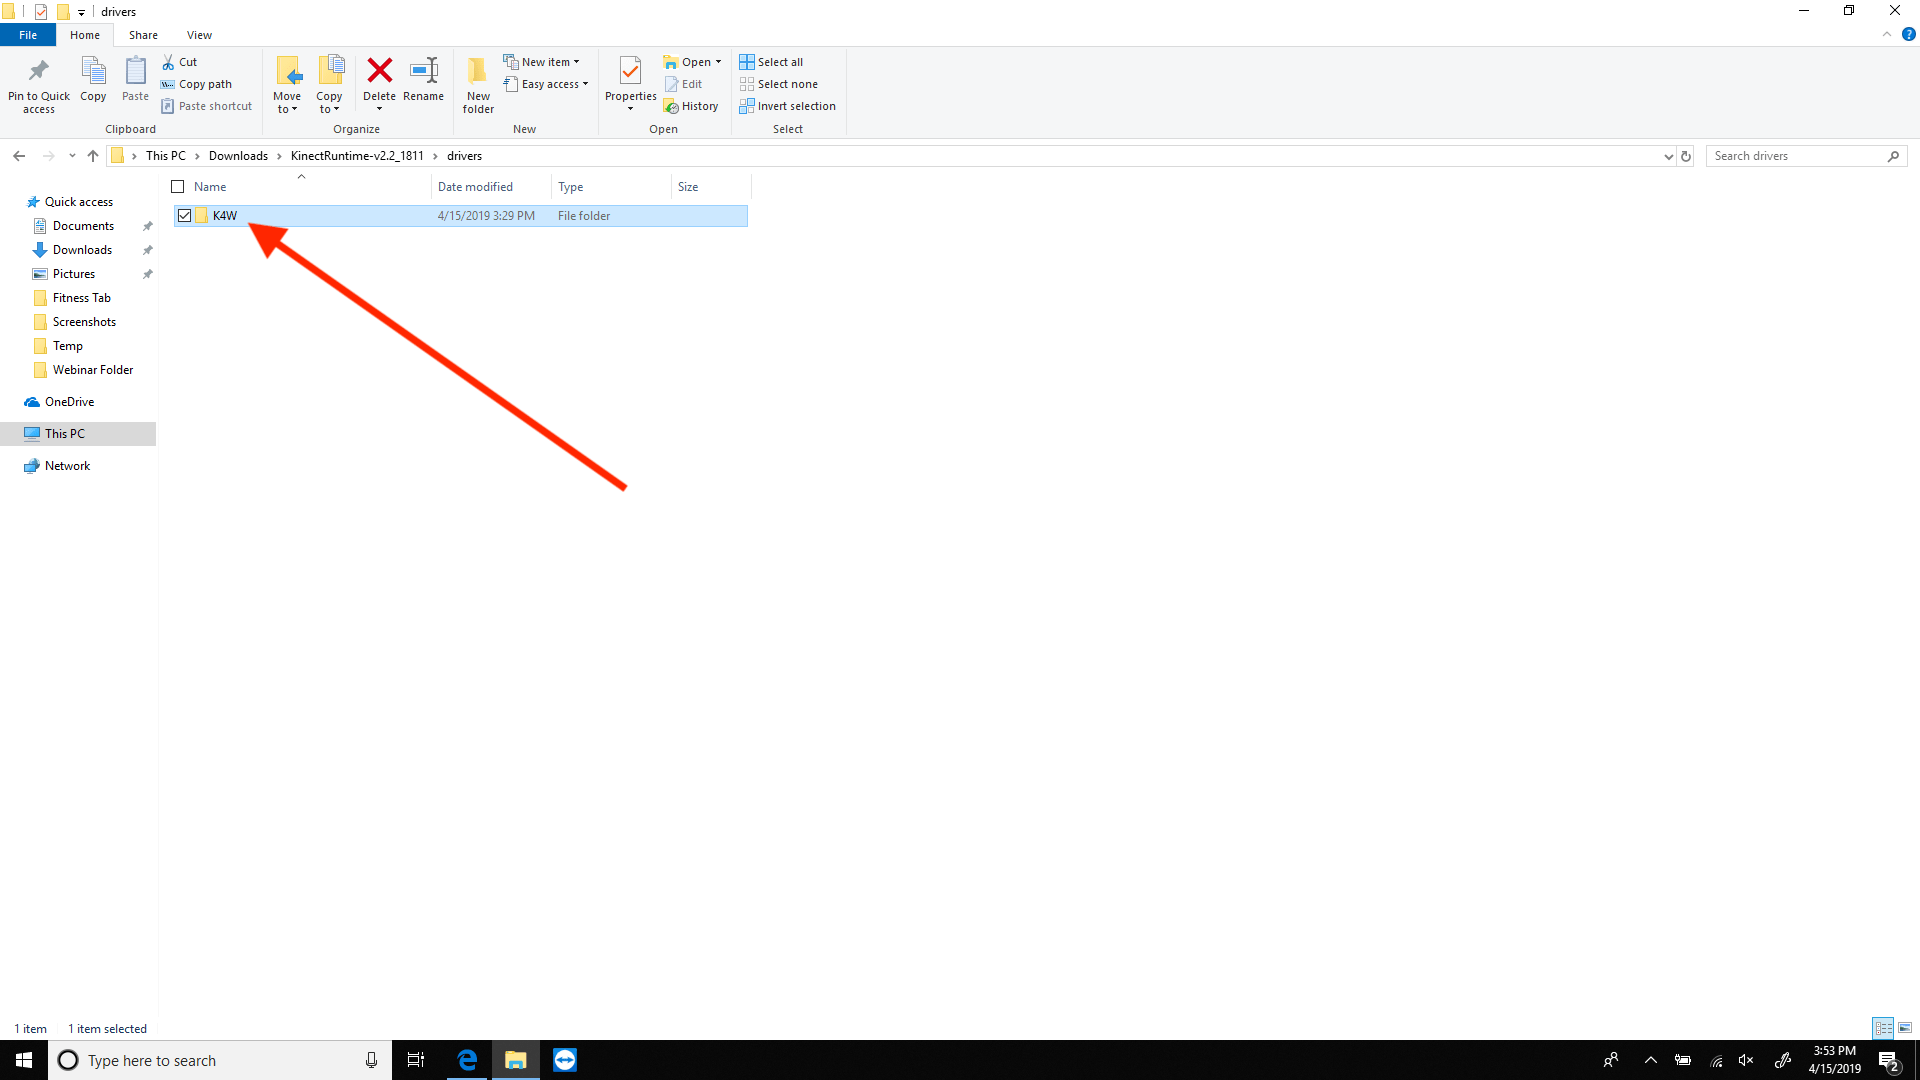
Step 6 : Open the Drivers folder.

Step 7 : Open the K4W folder.
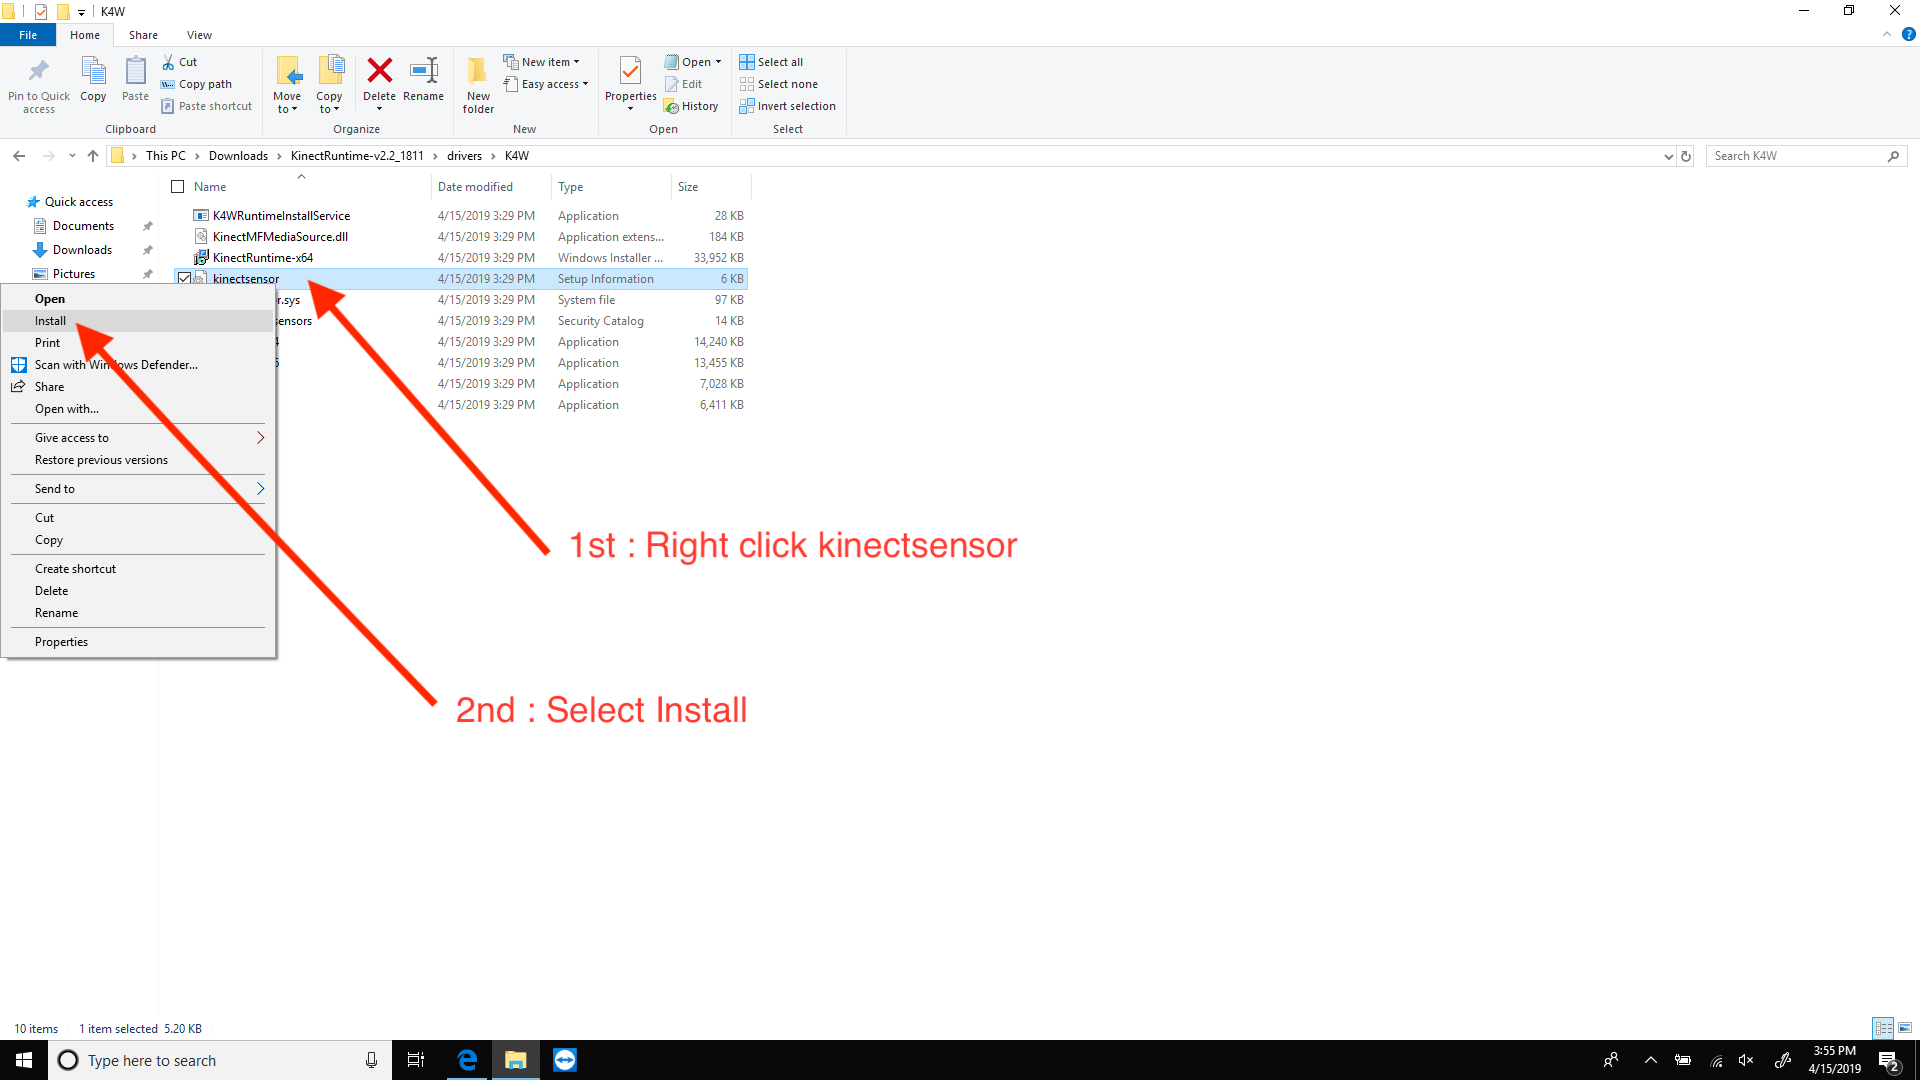
Step 8 : Right-click the file named kinectsensor, and click Install in the context menu.