First, verify that you have all the items listed
here to ensure a flawless setup and connection: 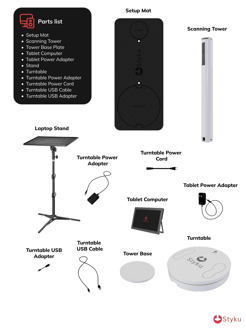

Avoid placing the turntable or scanner camera in bright light, such as sunlight or halogen LED light.
Additionally, make sure to keep reflective objects like glossy posters, mirrors, metal furniture, and windows out of the scanner camera's view.
Select a location with a minimum of 67x46 in (169x116 cm) of clear space for optimal setup.
Next, it's time to begin assembling the machine!


Lastly, you'll need to setup your tablet and keyboard like the diagram shown here, and then connect your tablet to the scanner:

