
What are the space requirements for a Styku scanner, and how do I set up the room?
What are the space requirements for a Styku scanner, and how do I set up the room?
Overview
The area around the Styku scanner must be kept clear of walls, objects, and bright light sources. Obstructions or poor lighting cause artifacts, holes, or scan failures.
Minimum room footprint
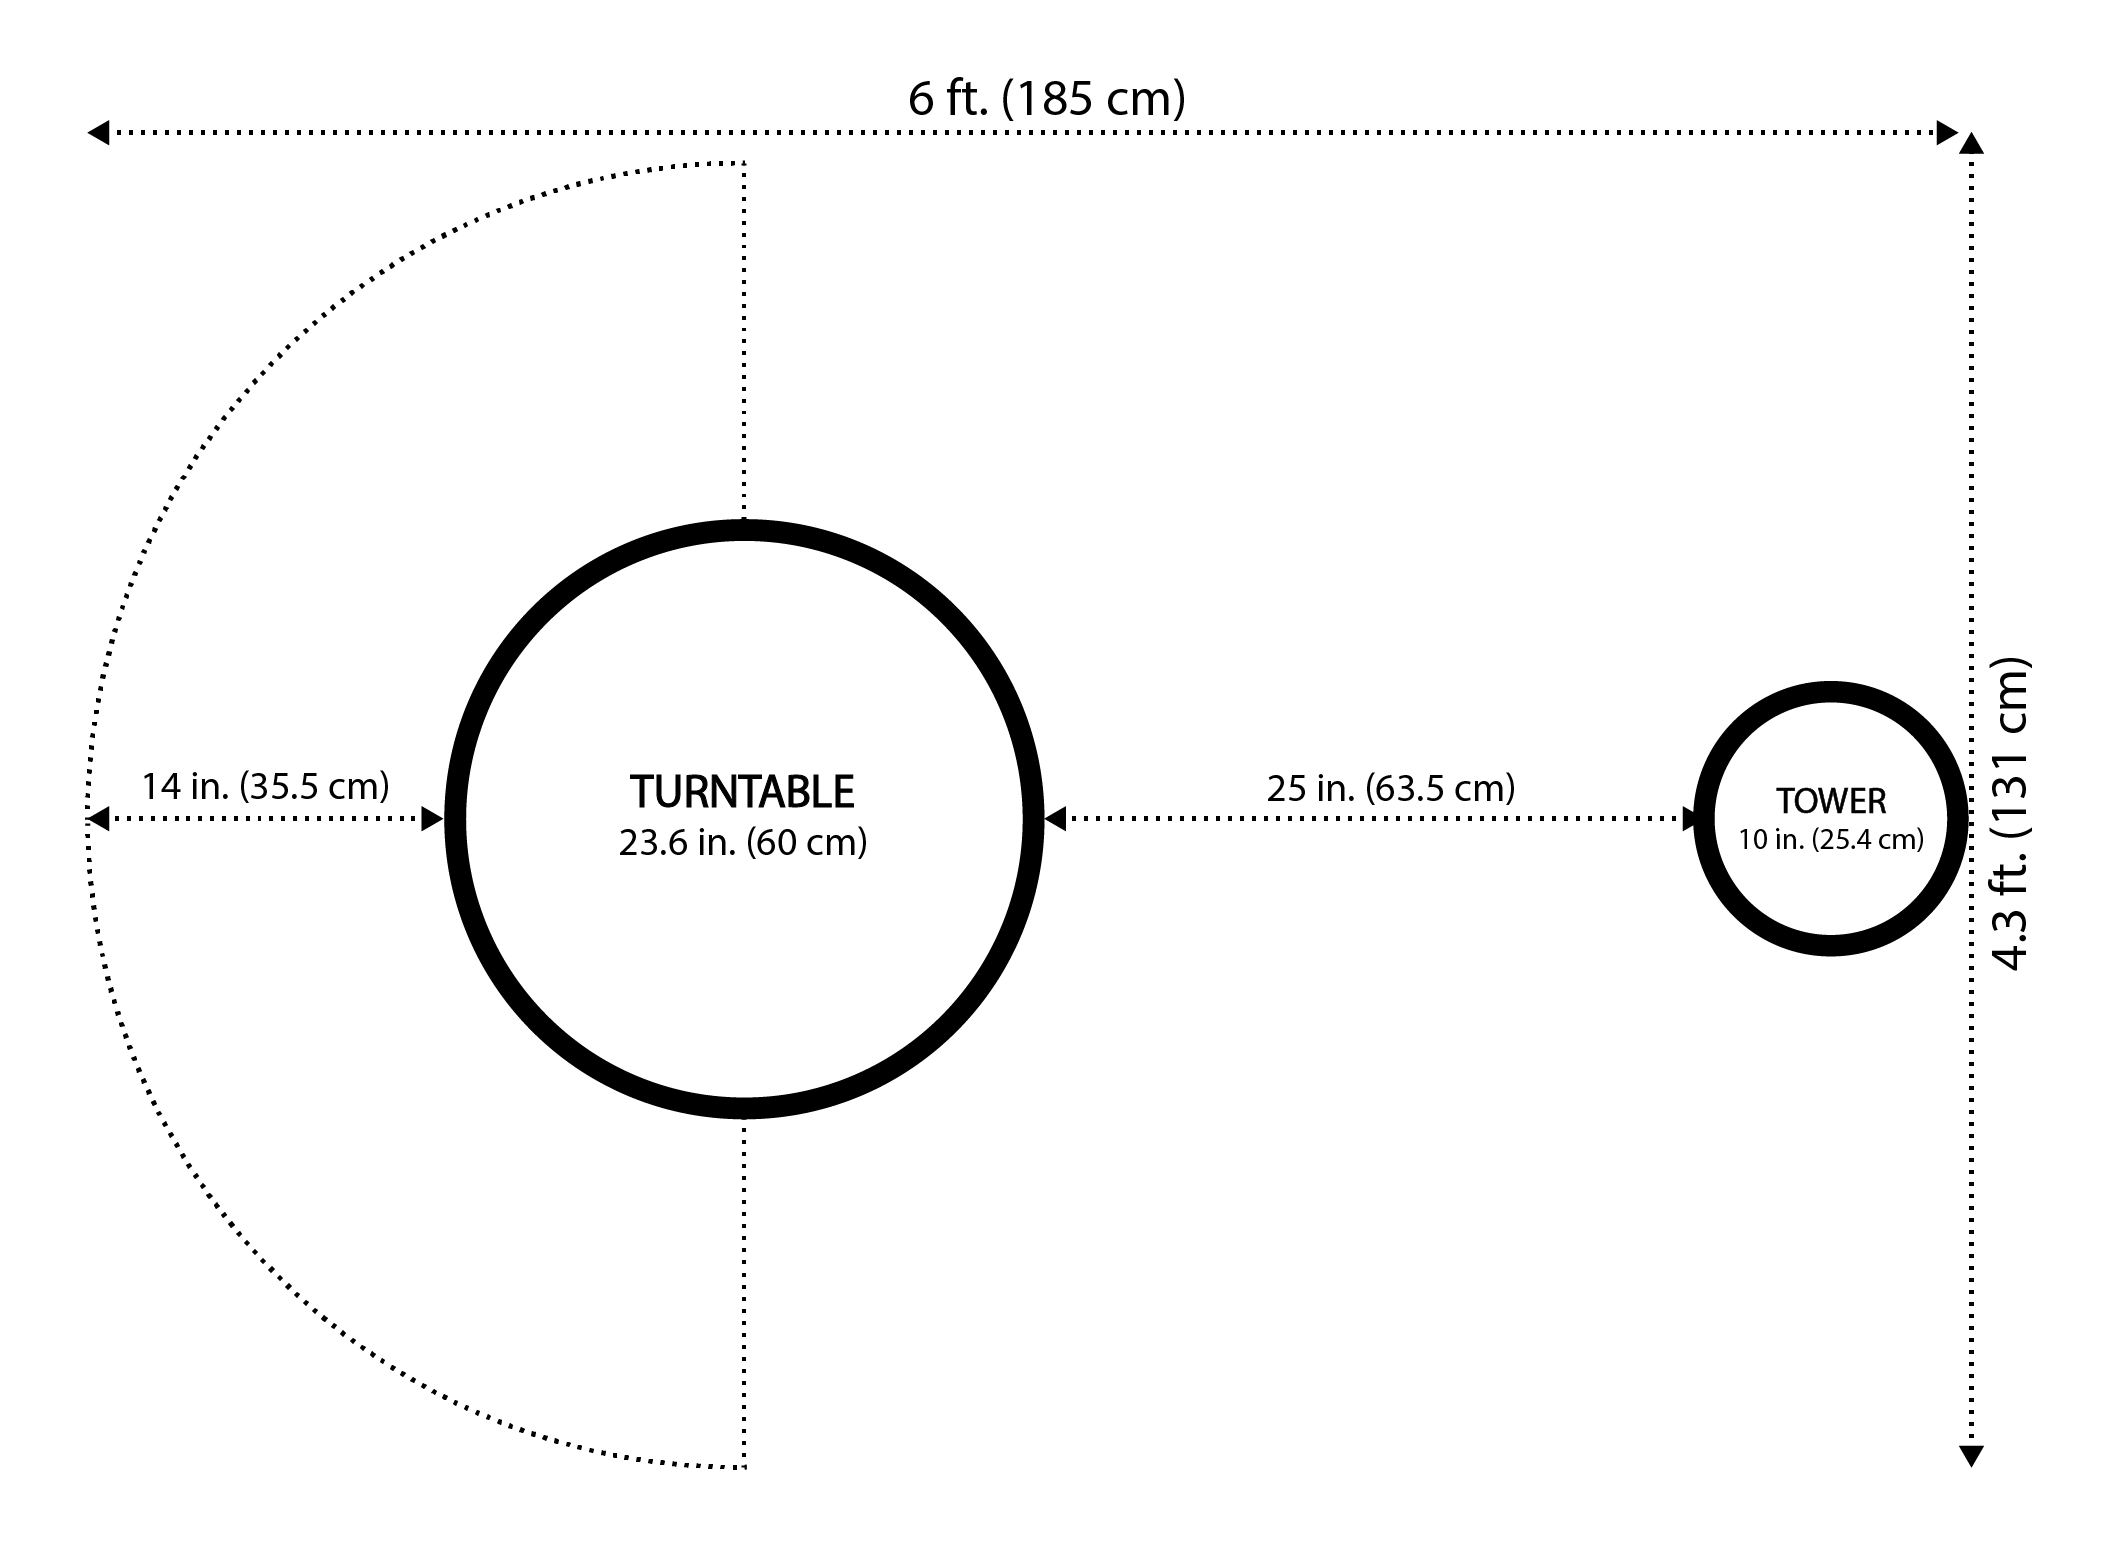
You will need a space at minimum 6 ft × 4.3 ft to fit the turntable and sensor tower with adequate clearance.
Clearance distances
Measurement | Distance
Turntable to sensor tower | **25 inches**
Turntable to side walls / back wall / any object | **14 inches minimum**, **18 inches recommended**
- The 14-inch minimum applies to all sides of the turntable simultaneously, not just the side facing the camera.
- The 18-inch recommended clearance gives the system more margin for taller clients and reduces the chance of wall geometry being recorded into the scan.
- If a wall or object is too close, it may be captured during the scan, which can distort the 3D model or prevent the person on the turntable from being captured correctly.
Lighting requirements
- Avoid placing the scanner where bright lights or direct sunlight fall from behind or directly above the turntable.
- Windows, skylights, and overhead spotlights are the most common offenders. Use blinds, curtains, or repositioning to eliminate them.
- The infrared sensor adjusts its exposure based on ambient brightness. Strong light sources can overwhelm the sensor, making parts of the body difficult to detect and causing artifacts or gaps in the scan.
Background and floor surface
- A plain, matte background behind the camera tower (a grey wall or grey blind is ideal) helps the sensor cleanly separate the client from the environment.
- Place the turntable on a flat, stable floor surface.
Steps for setup
- Measure clearance on all four sides of the turntable before scanning — front, back, and both sides.
- Confirm the turntable-to-sensor-tower distance is 25 inches.
- Remove any objects, furniture, or equipment within the minimum clearance distance.
- Check for bright light sources — windows, overhead spotlights, or skylights — and reposition the scanner or block the light source as needed.
- For model-specific setup guidance, refer to the setup guide for your scanner model, available in the Styku Business Portal or included as a printed copy in your scanner's box.
Notes
- Clearance requirements apply to all sides of the turntable simultaneously, not just the side facing the camera.
- Lighting issues are a common cause of incomplete or distorted scans. If scans show missing patches or unusual artifacts, check the lighting environment first.
- The same clearance numbers apply across current (X2L) and legacy (S100, S100X, X2) Styku scanner configurations.
If this resolves your issue, no further action is needed.
If the problem persists, contact support through the Styku Business Portal at styku.com/portal and include: a description of your room setup, distance measurements from the turntable to nearby walls/objects, your scanner model, and a sample of a distorted scan file.
Applies to: All Styku scanner configurations (X2L, X2, S100, S100X)
Related Resources
- Getting Started with Styku: Activation, Hardware Setup, Training, and First Scan
- Why does my scanning environment affect scan quality, and how do I set it up correctly?
- Why does my 3D scan show holes, distortions, or deformations in the body model?